Ensure you can read the injector codes from your supplied photos easily.
If you can’t read them – we cant read them and you will be asked to supply a better photo which will delay your order and potentially require you to remove your intercooler again.
Each injector is manufactured with slightly variations in mechanical tolerances which means that one injector may flow more fuel through it while open than another. To work around this each injector is given a code that basically defines how much fuel it flows while open (among a few other things). This allows the ECU to vary injection times per injector to ensure that each injector is dispensing the right amount of fuel at the required time.
If injectors are not coded to the ECU correctly an inappropriate amount of fuel can be injected for a given request. This can potentially cause issues. Too little fuel will generally means that cylinder wont produce the power it should and too much fuel can increase cylinder pressures and temperatures and potentially cause premature engine failure.
We will code your injectors to your remapped ECU before sending the ECU to you to ensure there are no problems.
There are two ways to get your injector codes:
With a scan tool that will read them from your factory ECU (as long as the injectors were coded properly). You can speak with your mechanic who may charge a small fee to read them for you.
Read the injector codes directly from your injectors. This process is described below.
It is imperative to ensure that what you are supplying us is easily legible (photos or handwriting) and you have confirmed/double checked that they are accurately recorded.
If you have any questions or issues around this process please contact us.
The process detailed below is a relatively straight forward 15 minute job requiring basic tools.
Step 1: Remove Intercooler Fasteners
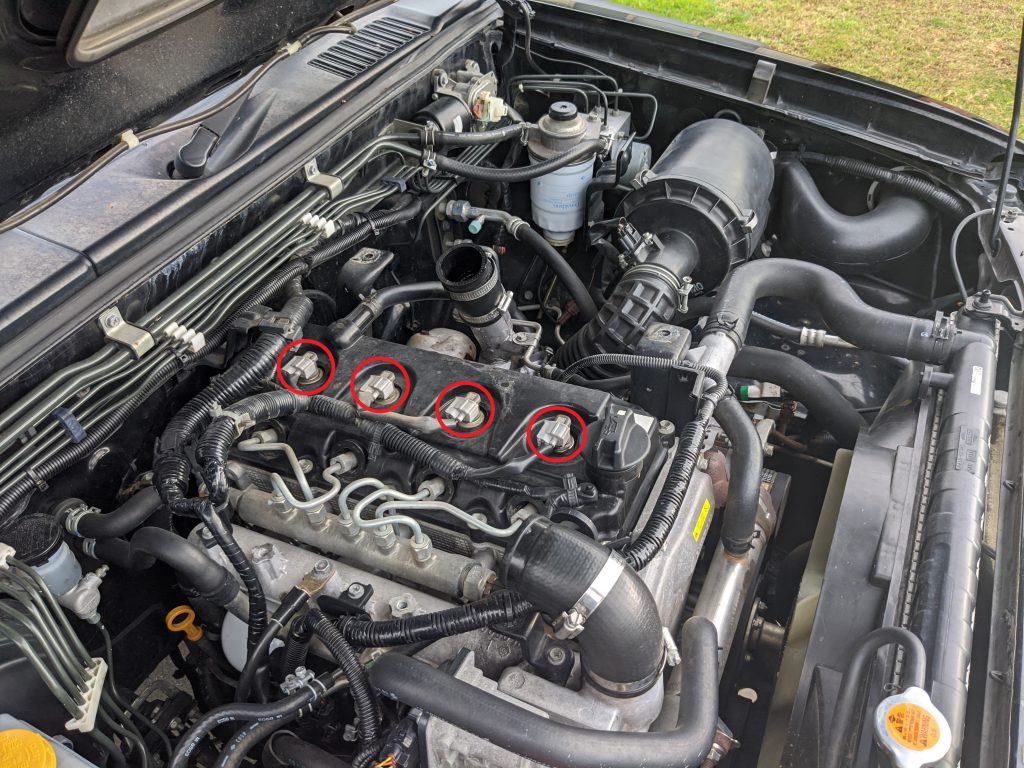
- Remove the 4 bolts holding the intercooler to the top of the engine as circled in the first three photos below.
- Loosen two hose clamps as circled in the 4th photo below.
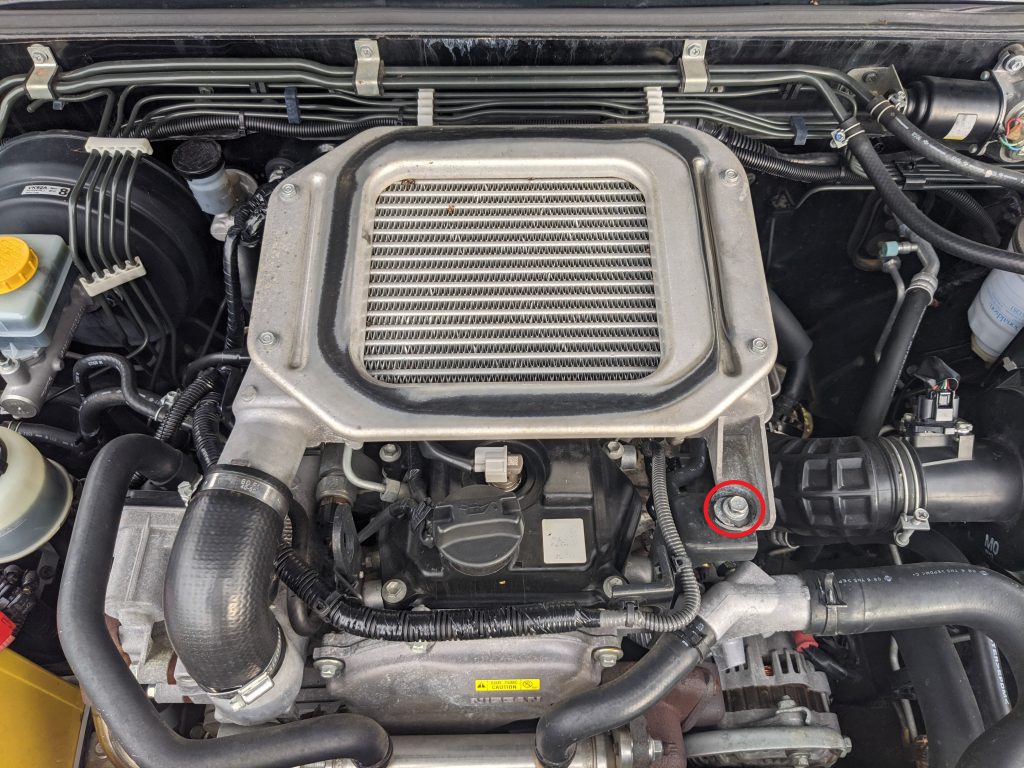
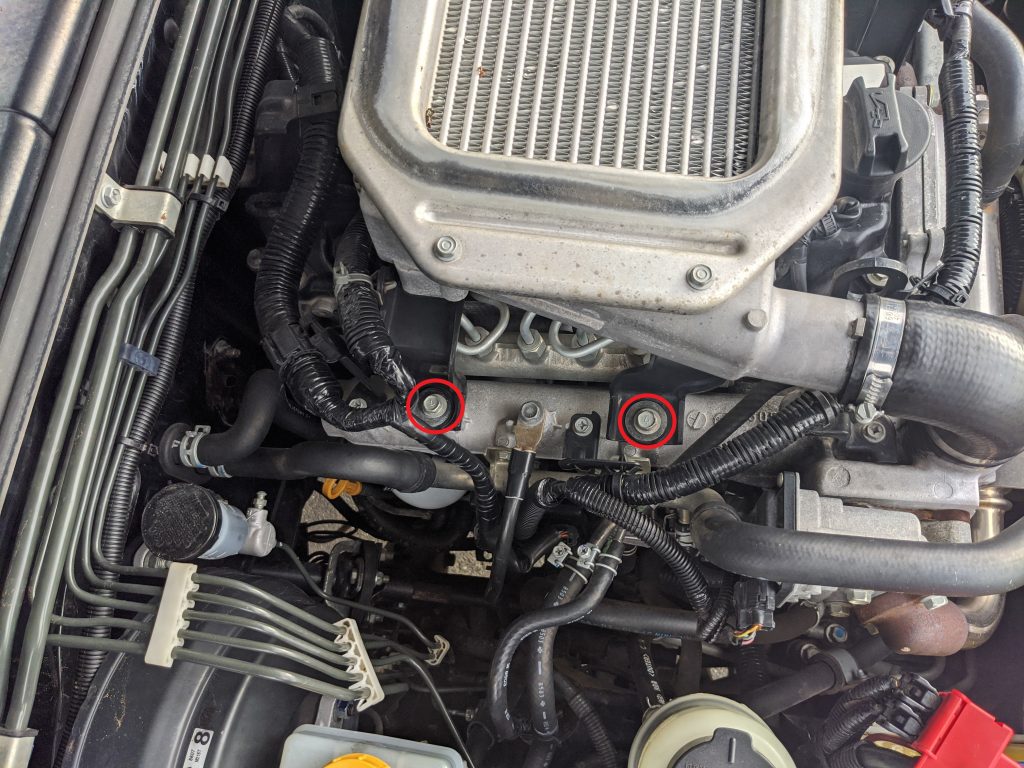
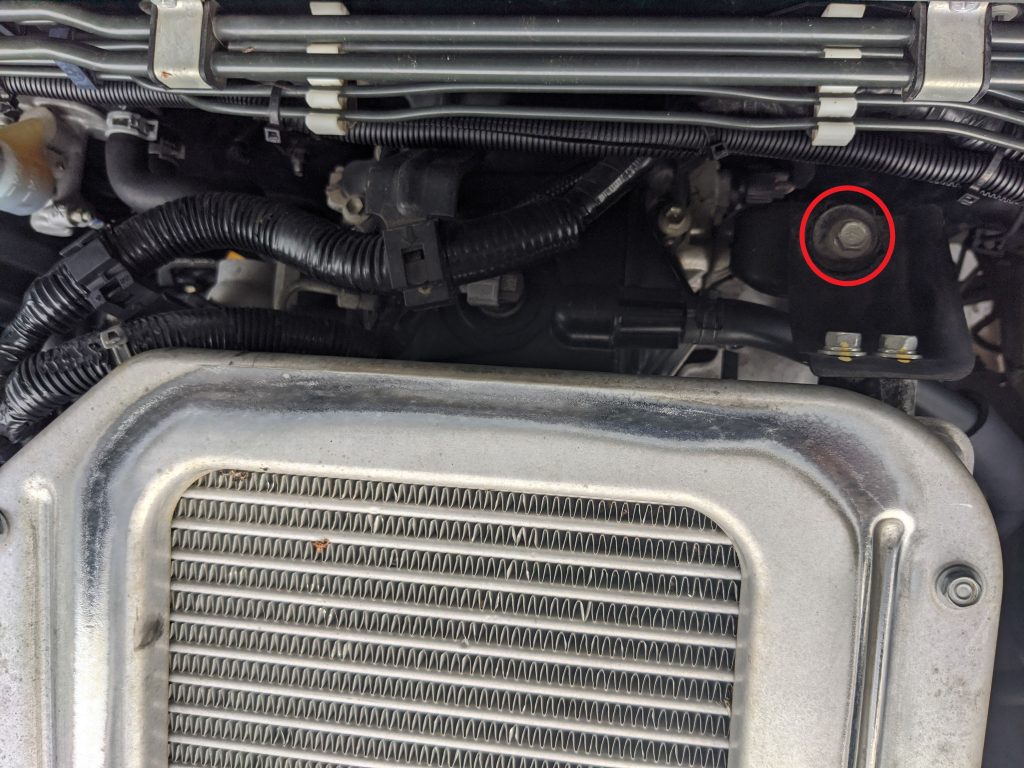
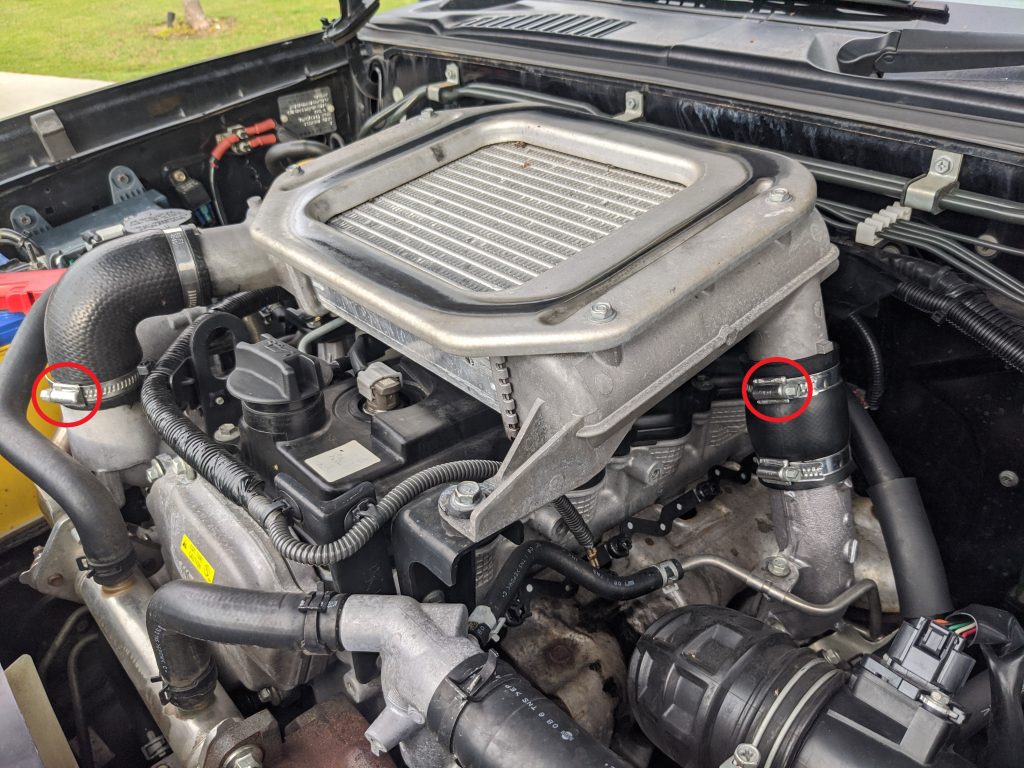
Step 2: Lift Off Intercooler
- Lift intercooler from the top of the engine. The intercooler hoses may need some persuasion by wiggling the intercooler while lifting it up. Set intercooler aside while avoiding having debris enter the intercooler and engine openings. This will expose all four injectors as circled below.
Step 3: Number Injectors
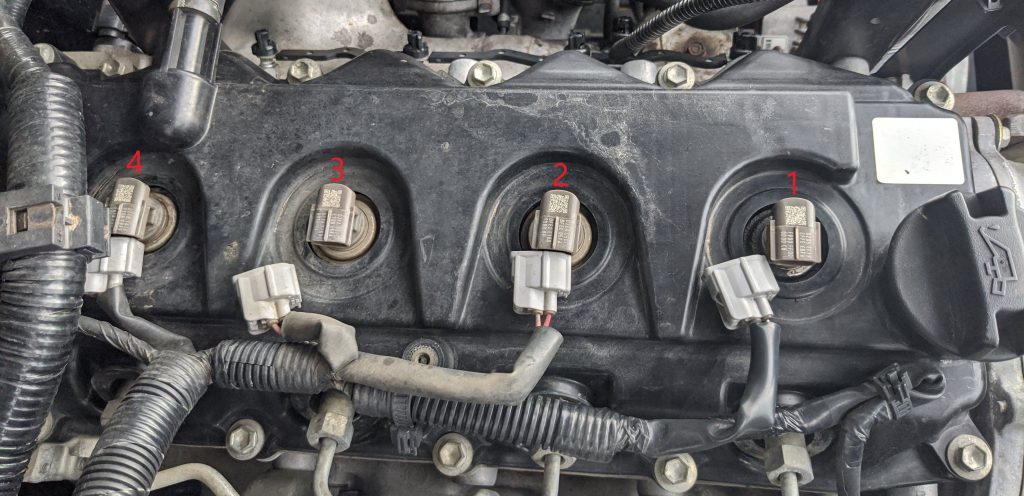
It is imperative that we maintain the correct location of each injector in relation to one another. The ECU needs to know the injector tolerances etc given by the code written on the injector as well as what cylinder that injector feeds.
Injector 1 to 4 with injector 1 feeding cylinder 1 which is closest to the front of the car. Please see photo below.
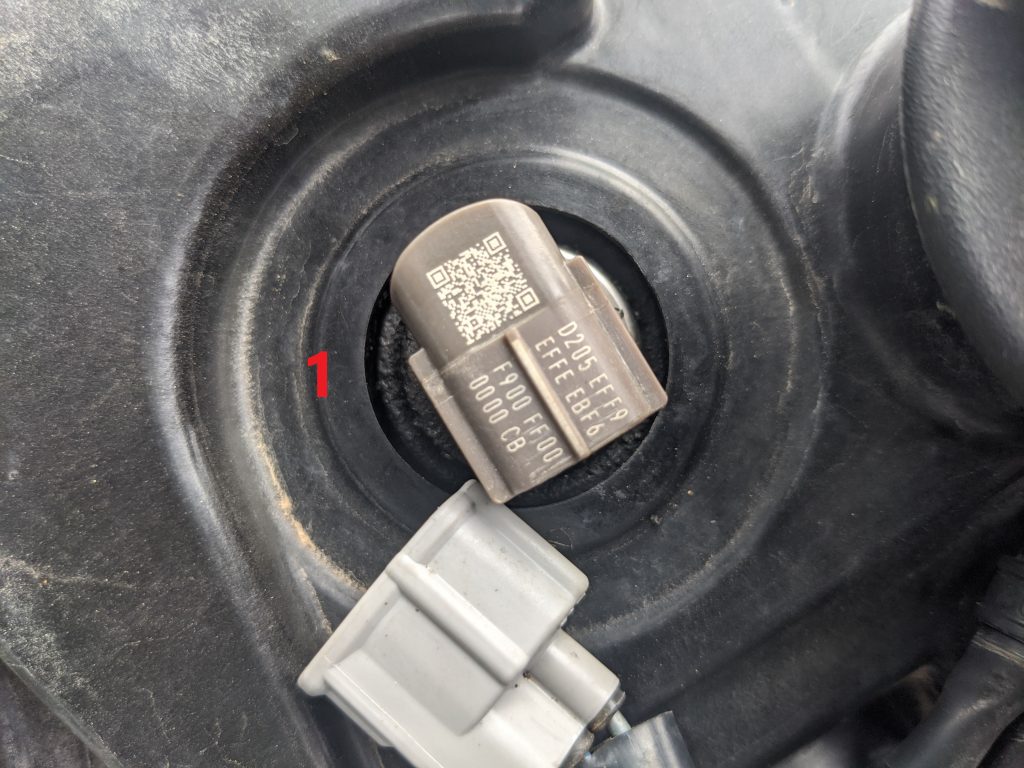
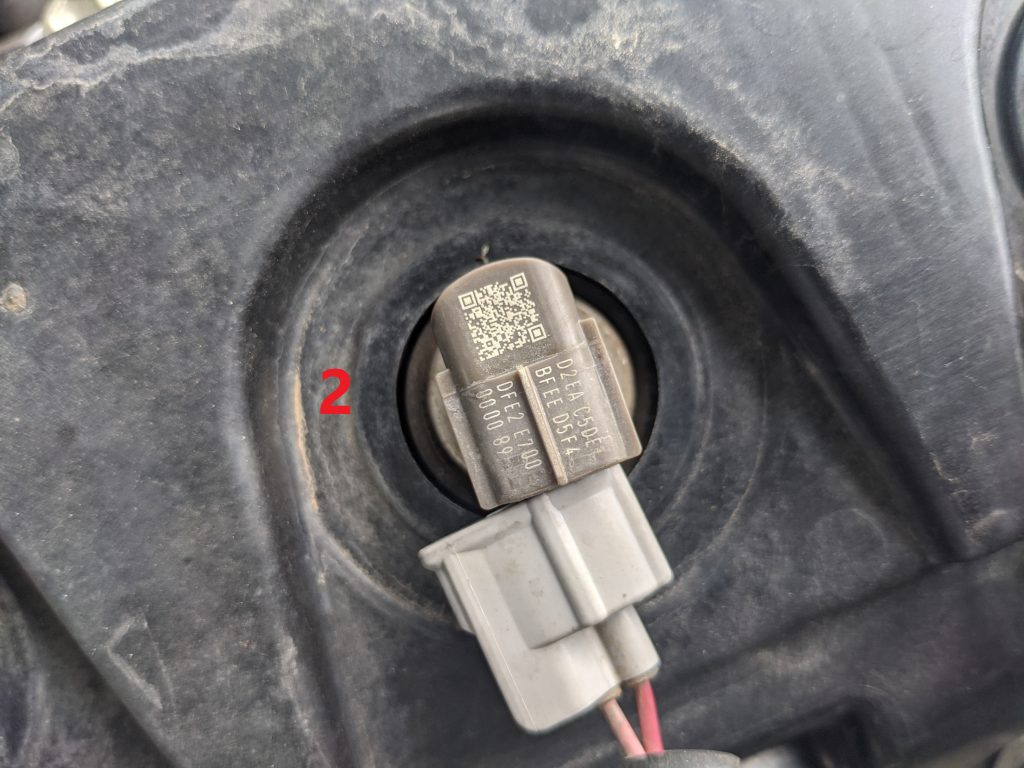
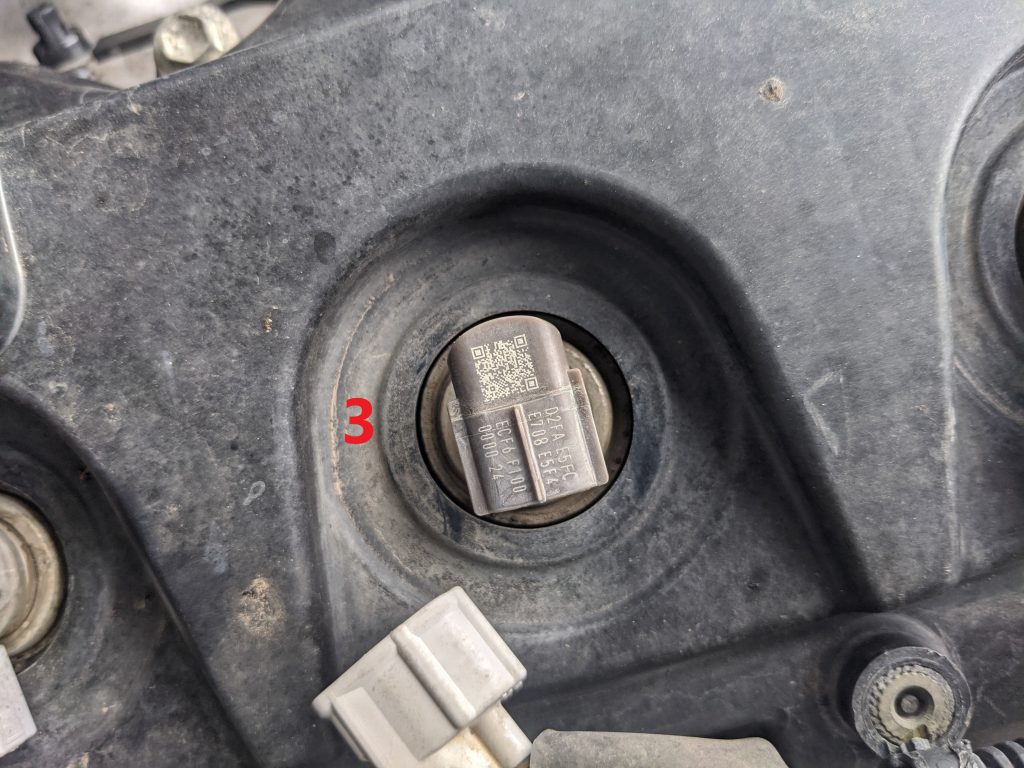
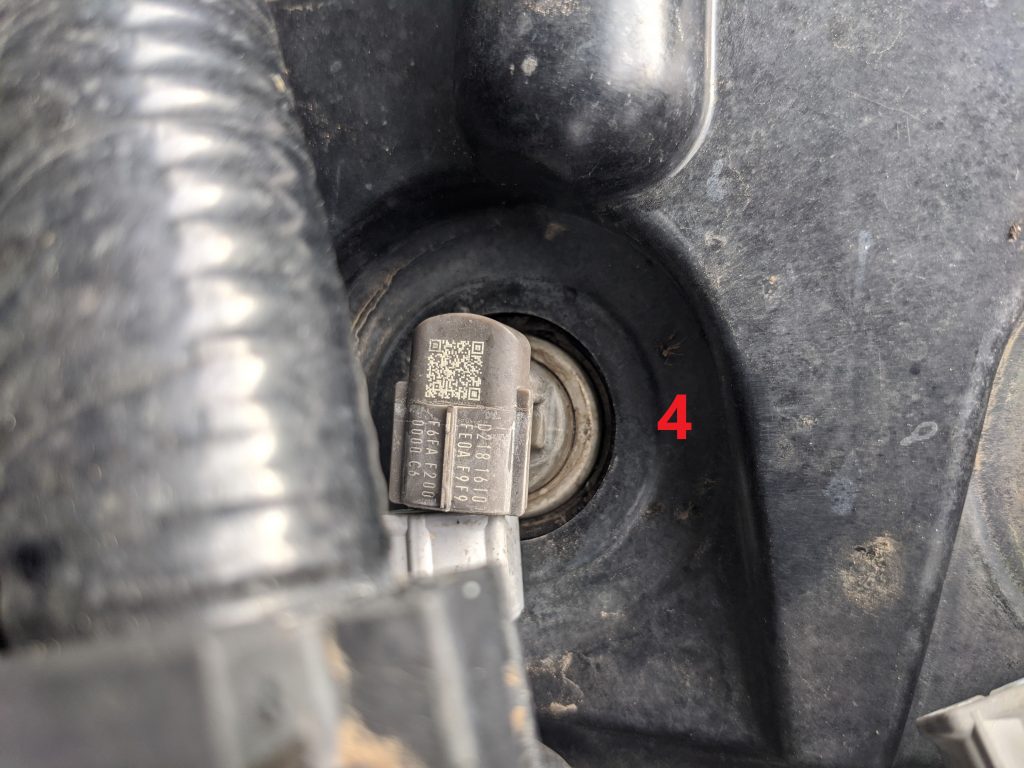
If supplying photos of each injector we recommend writing the injector numbers beside each injector with a marker (or other means that is easily distinguishable) and ensuring it is visible in the photo.
Step 4: Unplug Injectors
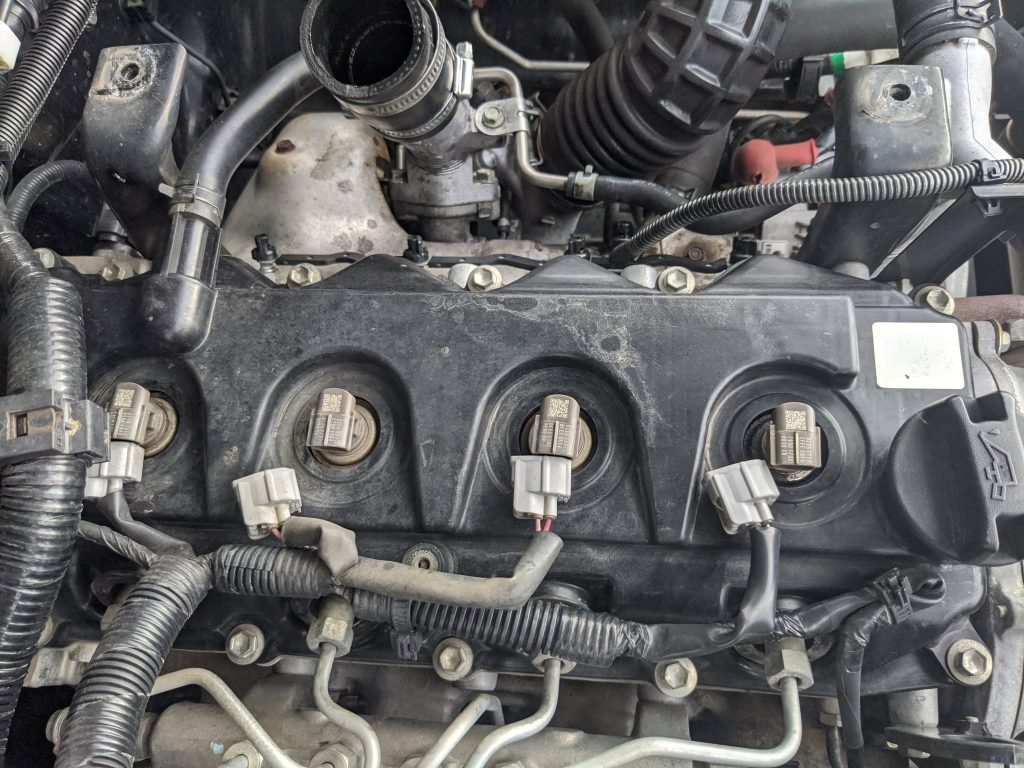
Disconnect the injectors from the loom to reveal the injector codes as shown in the second photo below.
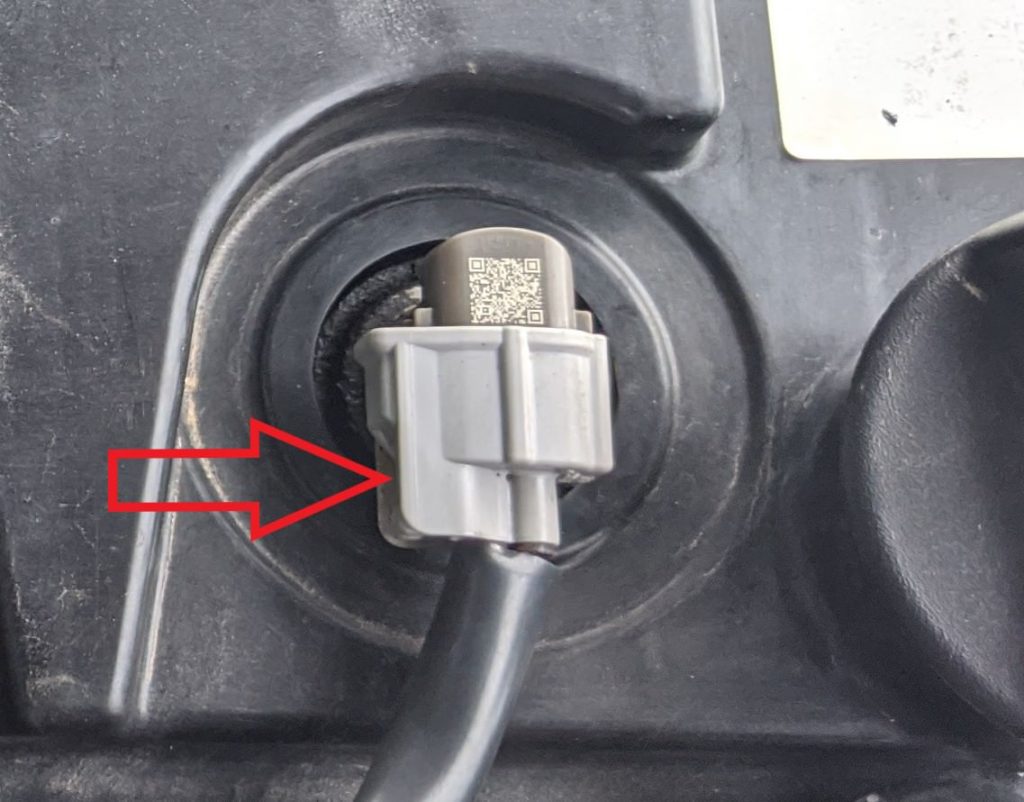
To disconnect each connector press down on the release clip as indicated by the red arrow in the first image below while pulling the connect away from the injector.
Step 5: Obtain Injector Codes
Injector codes are made up of 30 hexadecimal characters.
Hexadecimal characters without going to far into it are characters that include numbers between 0 and 9 and letters between A and F (inclusive). This means that there are no letter O only number 0 etc.
If you are taking photos of each injector (which is the preferred method) some example images are below.
Please take care to ensure that we can clearly read each character of the code before sending it in. Worst case we will ask you to get a better photo resulting in you potentially having to remove the intercooler again.
Step 6: Send Us Your Injector Codes
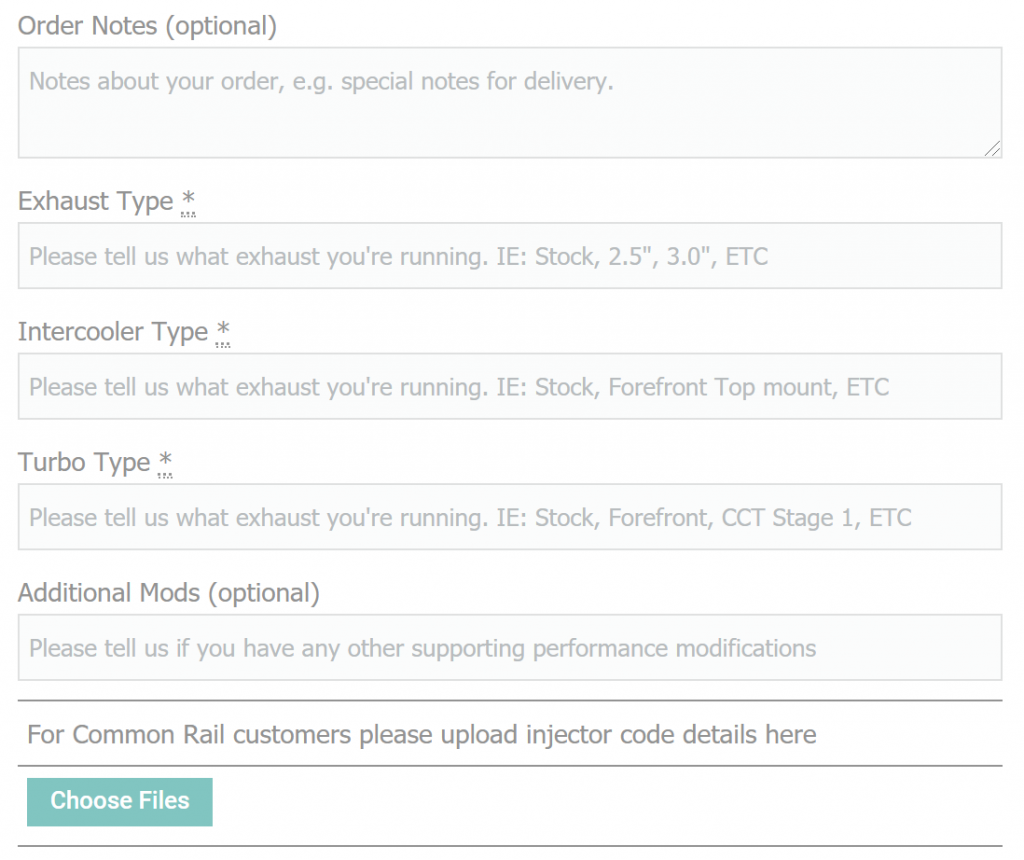
Please supply photos of injector codes or written codes via email along with your order number or you can supply the images during the checkout process by uploading them using the upload button. The image to the right shows you the fields you will be presented with during the checkout process.
Step 7: Refit Intercooler
Follow the above steps in reverse.
Please ensure all fasteners are tight and intercooler hoses are seated properly and hose clamps are tight.
